I can hardly believe it is only Tuesday! For some reason, I kept thinking today was Thursday. What a sad moment when I realized my mistake. Ah, well. The week will progress, and I’m grateful for this day…

Yesterday was my first hour one-on-one with my new mentee. We spent the time doing the craft I brought (so glad M didn’t have homework!) and getting to know each other with some open-ended questions. I am incredibly excited to get to know this little girl and help her reach her goals! I know I was nervous, and I think M was too, but the craft really helped to break the ice.

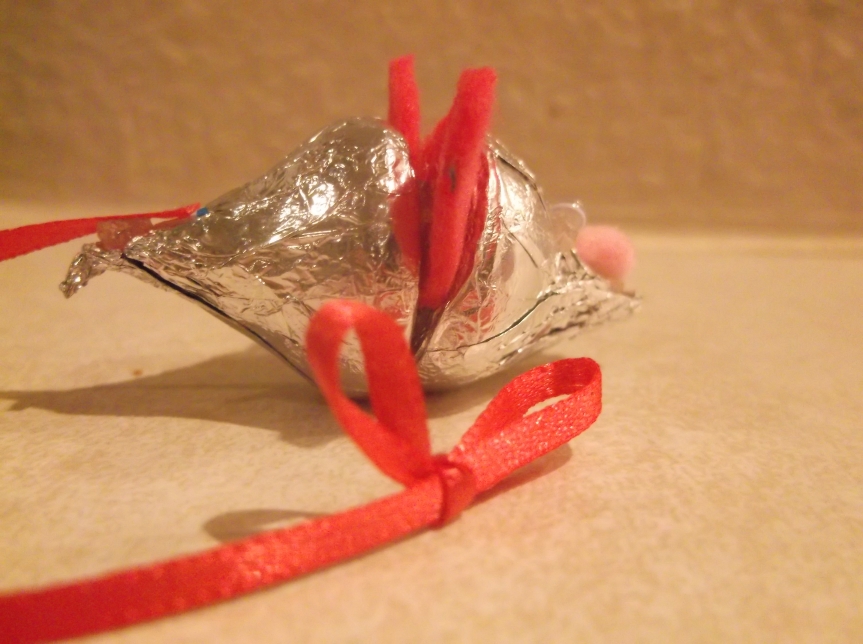
Last week, I posted some options for our first craft together. I opted to do the Hershey Kiss mice because it was the least time consuming, and I hoped, most kid-friendly. She was excited to do the project, and we had a lot of fun together figuring out how to assemble them. I wasn’t able to find a tutorial, but they were easy enough for us. I’m sure you don’t need them, but here are some instructions.
Supplies:
2 Hershey Kisses per mouse
Ribbon (we used hot pink)
2 mm googly eyes
Felt (hot pink)
Small pom poms (light pink)
2 mm glue dots
Scissors
To Do:
Create a template or freehand felt ears for the mouse. Cut a piece of ribbon for the tail. Use glue dots to adhere the ears to the larger end of a Hershey Kiss, and then attach the larger ends of two Kisses to one another with the dots. Also using the glue dots, attach the eyes, pom pom for nose, and ribbon for the tail. We tied our tails into bows at one end and alternated how we attached the bows to the tail-end of the mice. It was M’s idea to put the bow at the end of the tail. I liked it so much I followed suit! This is the mouse she made for me 🙂