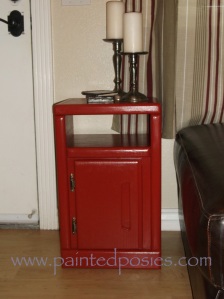
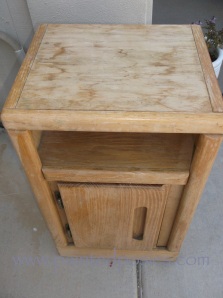
Recently I stumbled across a cheap little telephone table at a thrift store while visiting family up north. It seemed like the perfect fit for our entry in the living room, and I thought I might be able to spruce it up to fit right in. As if that wasn’t convincing enough to buy it, my dad decided to get it for me. It turned out to be just $5, but free to me. I paid $18 for a quart of paint, borrowed my brothers sander, and viola! A few hours and less than $20 later and we have a cute little side table for our living room.
 First things first, I collected my supplies:
Paint
Paint tray
Sander
Sand paper
Wet rag
Plastic tarps or garbage bags
Small paint brush
Foam roller
Drill or Screwdriver
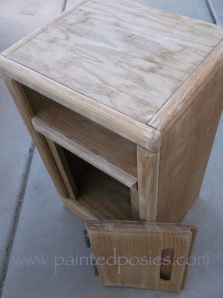 Once I got all my supplies, I removed the door on the stand and set the hardware aside. After lightly sanding the stand with the electric sander, I went over the hard-to-reach places with a sheet of medium grit sandpaper. Once the finish was nice and roughed up, I made sure to wipe the table down really well with the wet washcloth so that none of the sawdust was left over to wreak havoc on my paint job.
When painting wood furniture, the trick to making sure there aren’t any roller or brush lines left over to haunt you later is to:
1.) Pick a foam roller made for cabinetry. The less nap on the roller, or the flatter it is, the more likely you’ll be left with a smooth finish when you are done.
2.) Pick up the same amount of paint with your roller each time, and use the tray to roll off excess.
3.) Don’t make too many passes in each coat of paint. Roll the paint on enough for coverage, but don’t go over and over the same area multiple times. As the paint dries, you will start forming roller lines that won’t dry away.
4. When using a brush, the finer the bristles are, the smoother your surface will be when all is said and done.
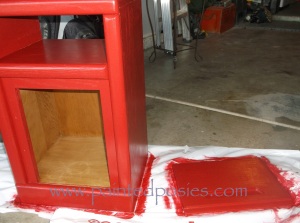
I used my foam roller to paint everything but the bits and crevices that it wouldn’t reach. I used three coats of paint, letting each coat dry in between. When all was said and done, the project took me just a few hours.

Here’s our finished table. Let me know what you think!


