
So, earlier this year, I posted a how-to on getting stains out of the kitchen sink and repairing the porcelain. That’s about my extent of me getting my hands dirty when it comes to house repairs (haha, sorry, couldn’t help it!). Luckily, I have a pretty skilled husband who is also incredibly thoughtful — and puts up with my lame jokes no less. Not only did Joe fix the faucet in the kitchen after the hose started leaking, he took pictures of the process as a surprise for me so I could include it in my blog. I know, right? And boy, was he thorough. So, we can thank Joe for this very informative post.
Because there are over 30 photos in this tutorial, you’ll need to click on “More…” to continue on. Thought I’d spare those of you who don’t actually need to know how to replace a faucet. Yet.
Before starting the job, turn off the main water line outside or the local water line under the sink. Our local water line knob broke, so we had to turn off the main. And by “we,” of course I mean “Joe.”

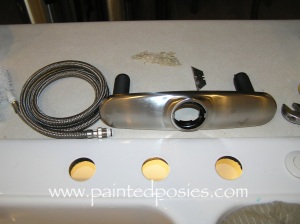
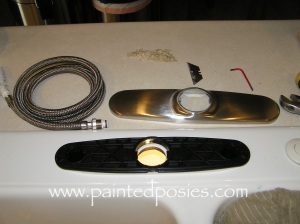
new faucet and tools for the job: screwdriver, screw gun with extension screw shaft, crescent wrenches,channel locks, new water valve, putty, teflon tape
broken water valve-it broke off while trying to turn off the water under the sink
NOTE: THE FOLLOWING PHOTOS ARE TAKEN FROM THE UNDERSIDE OF THE SINK, UNDER THE CABINET
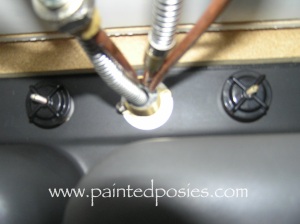
BEFORE: remove the black screw nuts on either side of the faucet by hand, and the compression ring holding the pipes into place using the screwdriver

AFTER
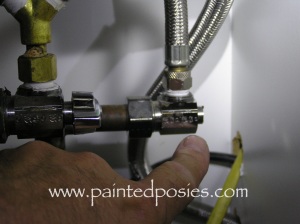
BEFORE: unscrew and disconnect the old copper connectors leading from the old faucet to the water lines

AFTER
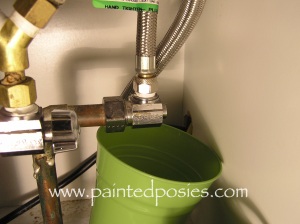
place a cup under the water valve to collect the water left over from the pipes, disconnect hose and wait until pipes drain
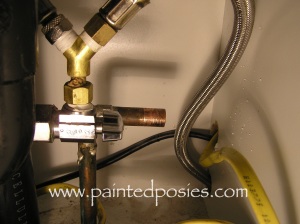
remove broken valve and hose with channel lock and crescent wrench
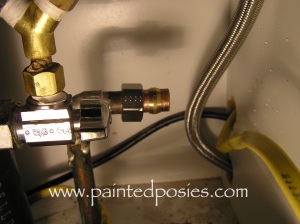
install new nut and compression ring on copper pipe (slides on)
wrap thread of new valve with teflon tape, slide on new valve and secure into nut
remember a few pictures ago, fourth one from the top? unscrewing the black faucet nuts allowed for the hardware to be removed from the top of the sink. scrape the putty/caulk from the sink with a razor blade. this is a picture of the new assembly lined up with the empty holes left from the old assembly being removed
BEFORE: add putty to underside of faucet base and set the faucet base in place
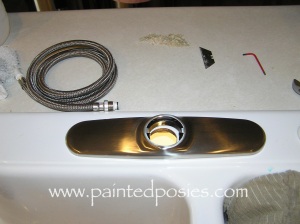
AFTER: set the faucet face plate over the base
the water lines are attached to the faucet base & knob, so feed that through the face plate. the faucet will line up and have a way of clicking into place, ours had notches Joe had to line up and then the faucet turned into place
MOVING BACK UNDER THE CABINET:

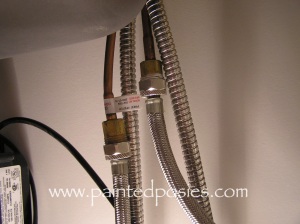
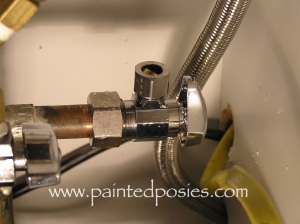
BEFORE: a picture of the new assembly from underneath the cabinet, looking up, without the nuts or compression ring attached yet
AFTER: the nuts and compression ring secured using the crescent wrench
AND BACK UP TOP:
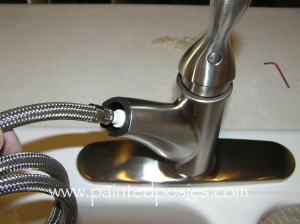
BEFORE: feed the new faucet hose through the top of the faucet
AFTER
secure a twist tie around the hose to prevent it from falling through the faucet while working under the sink
UNDER THE CABINET:
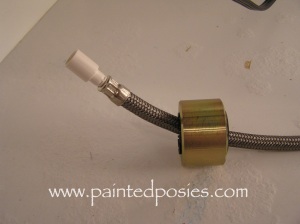
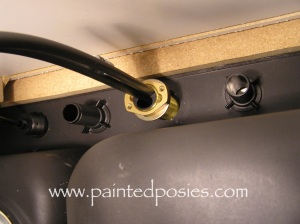
add the retractor weight to the hose under the sink
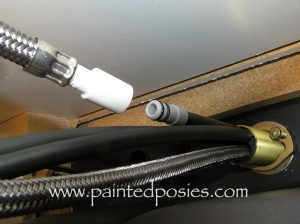
VIEW FROM UNDER THE CABINET, LOOKING UP AT THE SINK BASE: connect faucet hose (left) to hose line (right)
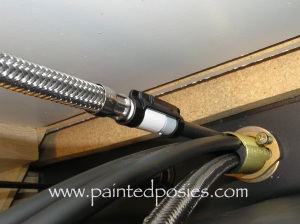
secure the locking clip in place

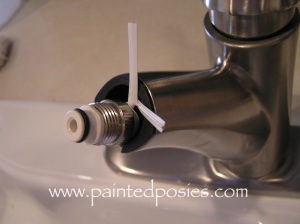
BEFORE: put the teflon tape on the threads of the water valve and screw the hot (red) and cold (blue) water hoses onto the valve
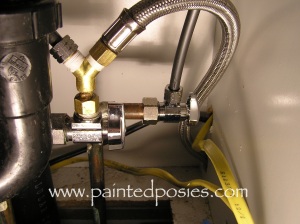
AFTER: (left to right) new hoses attached to the water valve, the dishwasher hose is attached already to the far right

turn the water back on and flush the faucet, remove the twist tie
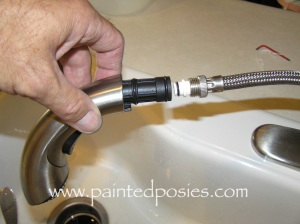
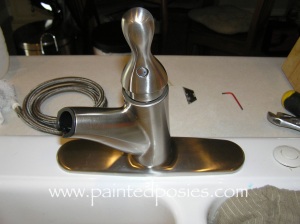
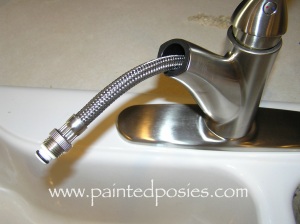
BEFORE: line up the faucet with the faucet hose and screw to connect
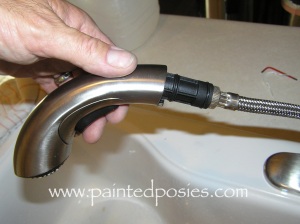
AFTER: let the head and hose retract and snap into place
FINISHED!!!!


