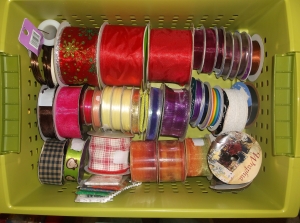
Slowly but surely I’m recovering from whatever bug I caught over the weekend. I feel better than I did yesterday, and here’s to hoping I feel better tomorrow! While I still felt decent on Sunday, I reorganized my craft supplies and thought I’d share a few tips and pics here.
Years ago, I owned a small craft business and sold my wares at the farmers market nearby. At that time, I had a lot of supplies that took much more energy to organize and inventory. So it’s a nice break to have only a “few” things to keep track of now, especially since I have very little room in our new place to store these things. Funny side note: When my husband and I bought this house, we were so excited to get our first home that we overlooked one small detail. It does not have a master bedroom closet. Only when we were doing the final inspection and had spent all the time and money on everything involved with buying a house did we realize there was no closet in our room. By then, it was too late to back out since our hearts were set on the deal. I’m paying for this now, let me tell you. There are two other rooms with closets, and since I’m a good wife, my husband gets a man cave where he stores his clothes and manly things, I get the guest bedroom to store everything else. Lucky him. We DO have two linen closets. But no pantry. Don’t get me started on that one…
Back to the point! Since I’ve downsized my supplies, and since we have to be creative with storage, I have things split up a bit per closet by category. This works nicely for us, and it may for those of you who have storage dilemmas as well.
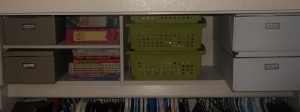
guest bedroom closet storage
I have a shelf in the guest bedroom closet that I store my craft books, memory boxes, and general craft supplies in. The space goes all the way up to the ceiling, so what you can’t see is how high I’m able to stack things. The green bins hold my craft supplies: one for ribbon, one for painting supplies, and one for everything else.
Luckily, I only have a bin half-full of ribbon to store. I have room for a second layer of ribbon supplies as needed. Looks like a shopping trip is in order 😉
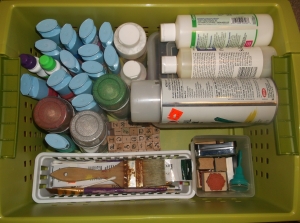
So I realized I have more painting supplies than I thought. This bin is just for crafting, but I have a desk stocked with my fine art painting supplies too. Here is a picture of the bottom layer of crafting paint supplies. Over this I put the bowls, rags and cups I regularly use when I’m working on a project. Notice that I use containers within containers to corral everything. This is important for organizing since it keeps like things together. I tend to grab storage containers when I find them cheap or second-hand (the garage is filled with these, it’s sort of an obsession). I’ll use leftover product boxes when I can too.
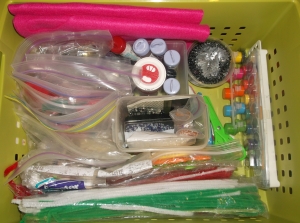
And the last bin is for the “other” stuff. I have my nieces and nephews over a lot, and they like to do projects, so there are a lot of buttons, pipe cleaners, beads, paper scraps, etc. in this bin. I put the kid’s watercolor paints in here too so that everything is all-in-one for when they are here. I don’t have enough stuff to label the baggies full of bits and pieces, but you could do that if you have more to keep track of or have the ambition to do so. We have a label machine, and if I wanted to take this a step further, I’d make labels for the bags too.
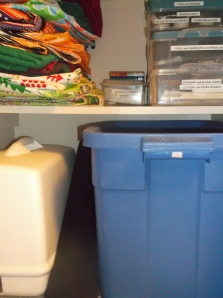
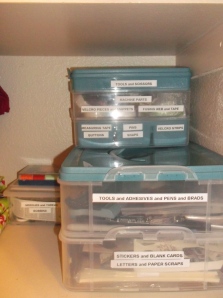
In one of our linen closets, I have my sewing and scrapbooking supplies. The large bin on the bottom right holds all our fabric, the sewing machine is on the left and above that are the containers I did label, because there are so many little tid-bits involved with sewing and scrapbooking. Just don’t mind the stack of tablecloths on the upper left! 😉
linen closet storage

It’s rough trying to organize everything on a budget, but if you are creative and ambitious enough, I know you can do it too! If you have any ideas or tricks, please share. I can always use more of those!


